Lesson: 9
By Mary Ann Boysen
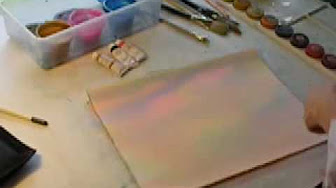
The watercolor glazing process is a series of washes (the application of paint to paper, usually with a large brush). Keep your paper tilted so there is a smooth transition from one stroke to the next.
|
Click on the image for the video |
For Beginners
If wetting the paper on both sides seems stressful to you, I would suggest using a wooden board to staple the paper down, then only wet one surface before each wash.
Before stapling the paper, it must be expanded by soaking it in a tub of clean water for just a few minutes. Do not stretch the paper by hand while stapling. Trust me. The paper is already stretched to the limit and will shrink while drying, creating a taut surface on which to paint.
These glazes of color are laid down with a chisel-edged brush much like a house painting brush, but with softer bristles...like ox hair or sable. The stiffer the bristles, the more likely you will lift color from the first wash when you lay down the second color. So.....softer is better.
Keep your subject simple.....VERY SIMPLE.... The watercolor glazing technique is all about luminosity of color, not the craftsmanship of fine detail. MOOD is more our subject than anything.
More Advanced
The watercolor glazing process is best done with a wet-in-wet procedure_ and I have found it much easier to accomplish if the paper is wet on both sides. By using Plexiglas or any non-absorbent surface (you can even cover your wooden board with plastic wrap) the stretching process is eliminated and painting may be started immediately.
- Wet the paper on the back with a large “wash” brush
- Lay it on the plexi
- Wet the front in the same manner. It should adhere like a magnet. Give it a minute to absorb the water and expand. (“stretch”)
- Wipe the excess with a paper towel, and the painting process can begin.
While giving the paper a chance to expand you can start squeezing tubes of paint into individual cups or bowls. Add water to each cup and stir until the paint is thoroughly dissolved.
(A suggestion: Fuji film containers. They are translucent and you can see the color that you have put in them. Also you can use an indelible marker to write the name of the pigment in each container.
At the end of each day, cover each container with its lid to keep the paint from evaporating. The next time you wish to paint, the pigment will have settled to the bottom, therefore, if you wish heavier pigment for a painting just dip the brush all the way to the bottom of the container...no scrubbing and ruining the point of your brush trying to load it with pigment.
To Begin Painting
- It is my choice to start with a pale yellow (quinacridone gold is my new favorite. It is brilliant, transparent and can be used in place of raw sienna as an earthy yellow, but also can be used as a delicate yellow......VERY VERSATILE!
- There are several approaches to applying the second color. I usually use a red or pink (or you may use more of the original color to increase its intensity.)
- Allow the first wash to dry completely.
If you do this, you will have to re-wet both sides of the paper again with clear water and a soft brush to have the paper lay flat again.
- Or just plow right ahead with the second wash, knowing that some of the first wash will run down the page instead of staying in place. I am usually in a hurry, and do just that.
If you have several ideas for subjects you may apply washes for more than one at a time on separate sheets of paper. While one is drying, you can be starting another.
- If your paper begins to crawl up, creating hills and valleys, just pick up one corner (or at two corners) and lift it gently until you have eliminated the buckling, and then slowly roll it back down to the board. Rolling it will force the paper to lay flat.
If your paper wants to buckle or curl, is dry, and you have finished the many watercolor glazes needed to achieve the color you desire, you can lay it face down on a flat surface, dampen it with a sponge, cover it with paper, and weight it with books to allow it to dry.
- The third color, (not necessarily the third wash) is blue (my preference only). While that is drying, you may want to take a moment to think about the actual subject that you wish to paint.....or you may have known all along, but not yet drawn it. When the paper is totally dry you may begin to draw your subject.
- The next wash should define the subject and start using more of the local color of the background around the subject.....perhaps green, if it is a landscape.
- Now you should be using smaller washes in defines areas, such as the main subject, and its surrounding areas. (If bright whites are needed in the focal point, you may need to paint around the subject from the very beginning.) This process will continue, either over the entire surface or in parts of the painting....each layer covering a smaller, more defined area until each stroke becomes what we call “negative” painting.
With all these layers of paint, it is easy to lift color in certain areas to brighten the surface with highlights if needed. If we are really smart, we will have painted around the highlights, but I do not plan my paintings down to the last detail, so I usually have to lift the highlights. Masking them usually makes more trouble than it is worth, but sometimes is a necessary evil. If you use a masking liquid, it must be done before you wet the paper the first time.
Lesson 10: Figures and Faces>>
<< Lesson 8: Brightening the Winter Watercolor Landscape
Go to Glazing Results
Return to Watercolor Lessons
Watercolor Painting Tips

|
|
|
|
Related topics:
Flat wasshes
Graded Wash
Glazing results
My E-Books

Learning the Basics of Watercolor

Painting Flowers in Watercolor

Painting on Watercolor Canvas
|

